 |
| Waiting in anticipation for Independence Day 2 |

A perspective on modern design through the use of Adobe Software.
Thursday, March 31, 2011
Wednesday, March 30, 2011
Promotion: Check out my other blog
For those who own an Ipad or would love to take a look at the slew of games offered for this great device I've started a second blog. The purpose of this blog is to review and preview games for the device. I love handheld gaming and hopefully soon I will have a Nintendo 3DS. For the time being though check out my other blog and send some feedback my way about titles you would like reviewed or games you are waiting in anticipation for.
There are over 20 reviews up and I try to stay up late and download the most current games so the next day you can see whether they are worth your time or not. Thanks again, and probably tomorrow I will have a new tutorial or piece up.

Sunday, March 27, 2011


Friday, March 25, 2011

Big Day, Big Launch
So my buddies and I finally got back together to finalize the website details. Today marks the launch of our website: www.ten-o-eight.com and our design company. I am incredibly proud of our website designer and developer, Greg Kealey for putting in the time to make this site great.

Our company offers many services including any type of design, web development and maintenance, photography and photo editing. We are all Algonquin Graduates looking to leave our mark in the Advertising and Design community. We encourage any questions or comments. TenOeight is located in Ottawa, Ontario.
Sunday, March 20, 2011
Bark Face piece

Thursday, March 17, 2011
logos I've been working on
 |
| These are logos designed for an editing company |
 |
| They are solely designed in Illustrator |
Basic Tutorial: Creating an effective gradient map
Using Photoshop this tutorial will show you how to make a gradient map over an image to use mainly as a background image. Gradient maps mixes two colors together over the existing image to show contrast.
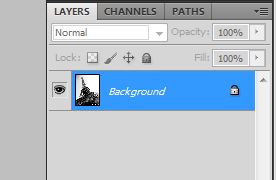
Step 1: Find an effective photo, maybe nature or buildings. I chose this beautiful image of a tree frozen by winter. Open the file select the layer and make sure it is unlocked

Step 2: To ensure that the gradient map is only two colors I typically turn the image into a grayscale image. Go to image /mode/ grayscale. After that I suggest going back into the same menu and turning the image back into an RGB or CMYK image.
After removing the color from the image I recommend that you duplicate the layer by right clicking on the layer and select duplicate layer. Once the second layer is created it is important to show greater contrast on the image by selecting a layer option.

For my image I selected a linear burn and set the top layer at 50% opacity so the image ends up being more pronounced.
Step 3: Now it's time to apply the gradient map. Go to your top menu and select Layer /New Adjustment Layer /Gradient map. A menu will pop up showing you options for preset gradient maps select the first one or the one that is automatically preselected. Test out various colors to see what works best for your image.
 As you can see from this image I selected and dark orange by clicking on the left hand side color option. My document is preset to RGB colors. So after applying an effective gradient map below you will see the end result:
 |
| Step 1 |
 |
| layer is unlocked |

Step 2: To ensure that the gradient map is only two colors I typically turn the image into a grayscale image. Go to image /mode/ grayscale. After that I suggest going back into the same menu and turning the image back into an RGB or CMYK image.
After removing the color from the image I recommend that you duplicate the layer by right clicking on the layer and select duplicate layer. Once the second layer is created it is important to show greater contrast on the image by selecting a layer option.

 |
| Duplicating the layer |
For my image I selected a linear burn and set the top layer at 50% opacity so the image ends up being more pronounced.
Step 3: Now it's time to apply the gradient map. Go to your top menu and select Layer /New Adjustment Layer /Gradient map. A menu will pop up showing you options for preset gradient maps select the first one or the one that is automatically preselected. Test out various colors to see what works best for your image.

 |
| Basic gradient map applied: End result |
Wednesday, March 16, 2011
First Tutorial: Using the pen tool to select an object
Okay so to continue to improve your skills in Photoshop you must consistently look for tutorials to figure out intricate and basic processes anyone can achieve in Photoshop. This tutorial is for beginners, it is meant to show you how to select an image with precision using the pen tool rather than the magic wand tool or eraser.
Step 1: Open Photoshop and select the Pen tool (left hand side). It doesn't matter what photo you use to practice on but an image with few sharp corners makes it very easy to select. First you will click on your image (using the pen tool) starting from one corner and begin tracing around the image's contour.
To the left is an enlarged view of the tool you will be selecting:
Step 2: In this image I used a blue brush to show you the highlighted area. The pen tool has anchor points that allows you to curve your selection. On a PC to edit the anchor points you hold CTRL while selecting the anchor. Try this out a few times and if you make a mistake don't restart just press CTRL + Z to undo your last point selection. Make sure you complete the selection by connecting the starting point to the ending point.
Step 3: Once you've made your selection right click and select (make selection). This will bring up a menu that asks whether you are interested in a feather radius. Feathers are amazing when it comes to photo's that don't have clean contours. For this image I selected a radius of 5. This essentially deletes any problems around the contour and fades the image into the background a lot better. Depending on the size of the image you should decrease or increase the feather radius. Once you've determined the feather radius click OK. If the selection is incorrect press CTRL + Z and try again.
Step 4: Now that you've selected the object. Right click and select inverse. Ensure that the layer is unlocked and simply press delete. This will leave you with the object alone with no background. You can then save this as a PSD and place in another image or upload online as a PSD for others to download. If you save this file as a JPEG it will automatically fill the deleted area with white space.
Step 5 (advanced): To improve the image resolution while keeping the PSD intact I always find that if you select the layer, right click and select duplicate layer this will copy the original layer. Then it is very important to select layer options directly underneath the layer options. For this image I selected Overlay, which makes the image darker and more pronounced. Also you can choose to change the opacity of the layer.
Step 6: Now to get into final details I selected the Burn Tool (presented in the photo to the left. The burn tool darkens the image and makes the image more pronounced. You can select the opacity, size and shape of the tool so darken the image according to your liking.
So if you have any questions just post below and I can probably answer them. I will be running through small tutorials as I continue to post information on my blog.
 |
| Step 1: Select Pen tool |
 |
| Pen tool enlarged |
 |
| Step 2: Select contour of image. |
Step 2: In this image I used a blue brush to show you the highlighted area. The pen tool has anchor points that allows you to curve your selection. On a PC to edit the anchor points you hold CTRL while selecting the anchor. Try this out a few times and if you make a mistake don't restart just press CTRL + Z to undo your last point selection. Make sure you complete the selection by connecting the starting point to the ending point.
 |
| Step 3: Feather radius |
Step 3: Once you've made your selection right click and select (make selection). This will bring up a menu that asks whether you are interested in a feather radius. Feathers are amazing when it comes to photo's that don't have clean contours. For this image I selected a radius of 5. This essentially deletes any problems around the contour and fades the image into the background a lot better. Depending on the size of the image you should decrease or increase the feather radius. Once you've determined the feather radius click OK. If the selection is incorrect press CTRL + Z and try again.
 |
| Step 4: Creating the PSD |
Step 4: Now that you've selected the object. Right click and select inverse. Ensure that the layer is unlocked and simply press delete. This will leave you with the object alone with no background. You can then save this as a PSD and place in another image or upload online as a PSD for others to download. If you save this file as a JPEG it will automatically fill the deleted area with white space.
 |
| Step 5: Duplicating the laye |
Step 5 (advanced): To improve the image resolution while keeping the PSD intact I always find that if you select the layer, right click and select duplicate layer this will copy the original layer. Then it is very important to select layer options directly underneath the layer options. For this image I selected Overlay, which makes the image darker and more pronounced. Also you can choose to change the opacity of the layer.
 |
| Step 6: Burn the image to your liking |
So if you have any questions just post below and I can probably answer them. I will be running through small tutorials as I continue to post information on my blog.
Tuesday, March 15, 2011
First written post: Update on current work in-progress.
So finally we have sprung ahead and for the first time the snow in Ottawa seems to be melting quickly. It's a great time to update my blog and post some interesting things that I've noticed in the world of design. Back in December I held a small Art Show at Algonquin College and I learned quite a bit from the experience.
At That point I was really into the use of grunge layers on top of the key images set to overlay. I found a very interesting tutorial from www.tutsplus.com. I recommend checking this site out for advice on any Adobe Software. So now that spring is in sight I'm looking for an interesting theme for a new potential Art Show. I recently made a piece further down on the blog of a wolf howling at the moon. I think that nature would make for a good theme for future work.
Also for the past few months a small group of former classmates and I have been developing a company and website designing websites and print for clients in Ottawa. Until the website is up (very soon) check out our Facebook page: http://www.facebook.com/#!/pages/TenOeight-Studios/138683836187476.
I also plan to continue to work with my good friend Jezsica Reilly, processing her photos into my designs. Checkout her portfolio and site: http://jezsicareilly.com/.
 |
| Pieces from Art Show, December 2010 |
Also for the past few months a small group of former classmates and I have been developing a company and website designing websites and print for clients in Ottawa. Until the website is up (very soon) check out our Facebook page: http://www.facebook.com/#!/pages/TenOeight-Studios/138683836187476.
I also plan to continue to work with my good friend Jezsica Reilly, processing her photos into my designs. Checkout her portfolio and site: http://jezsicareilly.com/.
 |
| After Photoshop. |
 |
| Jezsica Reilly Photography |
Promotion: Check out a great photographer in Ottawa.
 |
| The original photograph: Jezsica Reilly |
 |
| After the use of Photoshop you can view the transformation. |
To get in touch with Jezsica Reilly, link to the site below.
http://jezsicareilly.com/
http://jezsicareilly.com/

Wednesday, March 9, 2011

Monday, March 7, 2011

Thursday, March 3, 2011

Wednesday, March 2, 2011


Subscribe to:
Posts (Atom)